Tibetan bread is a simple, comforting bread known for its golden exterior, soft interior, and satisfying texture. Often enjoyed with a hot cup of Tibetan butter tea, milk tea, or a bowl of warming soup, this bread is a popular part of everyday food traditions in Tibetan communities. Depending on the region, household, and cooking method, Tibetan bread can take different forms, from thick, deep-fried breads to pan-cooked flatbreads.
One of the best things about making Tibetan bread at home is that you do not need complicated equipment or expensive ingredients. Basic pantry staples such as wheat flour, water, yeast, salt, sugar, and oil are enough to prepare a delicious homemade version. The dough can be mixed by hand, shaped according to your preference, and cooked in a deep pan or skillet.
In this guide, you will learn how to make Tibetan bread step by step, understand the ingredients, discover traditional serving ideas, and explore practical tips for achieving the right texture. Whether you are trying Tibetan food for the first time or recreating a dish you enjoyed at a Himalayan café, this recipe offers a straightforward way to bring the warmth of Tibetan-inspired cooking into your kitchen.
What Is Tibetan Bread?
Tibetan bread is a broad term used for several types of bread associated with Tibetan cuisine. Different preparations vary in thickness, texture, ingredients, and cooking technique. Some are leavened and soft, while others are flatter and cooked directly on a hot surface. Fried versions develop a crisp, golden crust while remaining tender inside.
Bread holds an important place in many Himalayan food traditions, where it is served alongside tea, soups, vegetables, meat dishes, and other everyday meals. In colder climates, freshly cooked bread makes a satisfying accompaniment to hot drinks and hearty food.
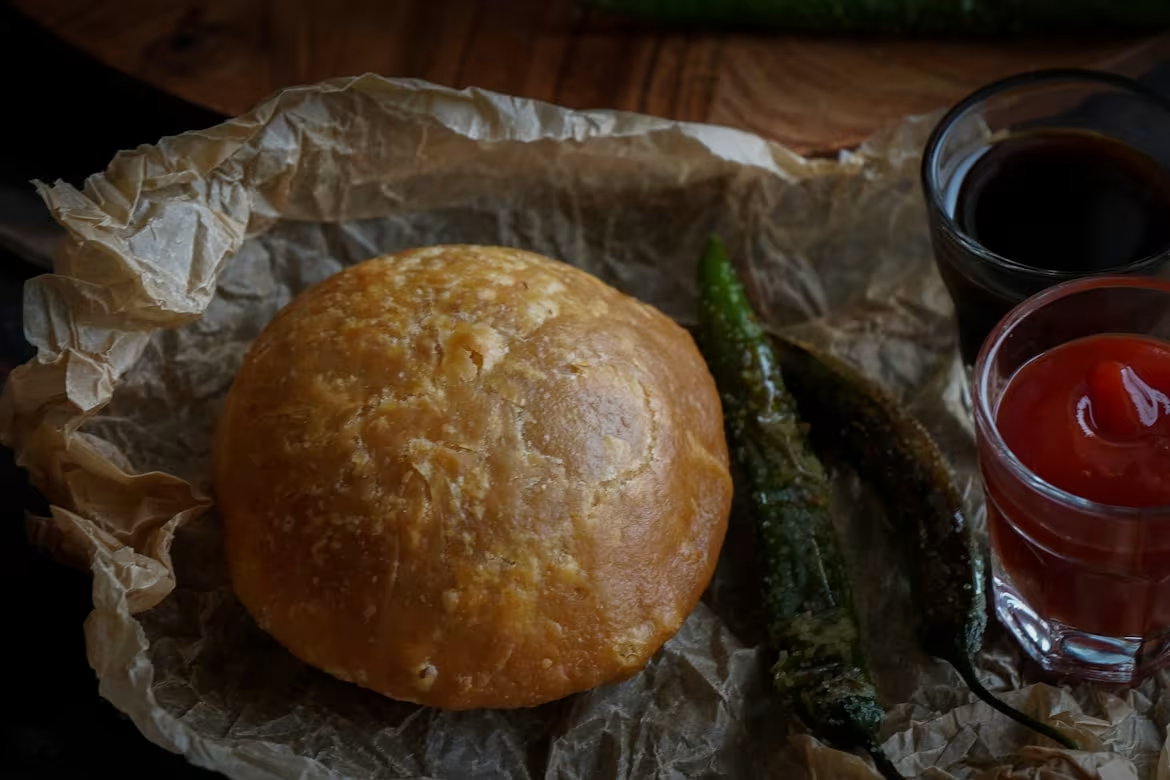
The version featured in this recipe is a soft, yeast-raised Tibetan-style fried bread. It has a lightly chewy centre and a golden outer layer. The dough is allowed to rise before being shaped and fried, creating a texture that is different from an unleavened flatbread.
It is important to recognise that there is no single recipe that represents every Tibetan household. Ingredients and techniques vary, and the name “Tibetan bread” may refer to different preparations in different places. This recipe is a practical home-style interpretation rather than a claim to reproduce every regional tradition.
What Does Tibetan Bread Taste Like?
Fresh Tibetan-style fried bread has a mild, comforting flavour. The flour provides a gentle wheat taste, while yeast gives the dough a slightly fermented aroma. A small amount of sugar supports the yeast and helps the crust brown during cooking without making the bread noticeably sweet.
The exterior is golden and lightly crisp when the bread is freshly fried. Inside, the crumb is soft, airy, and slightly chewy. If the dough is prepared correctly, the bread feels substantial without becoming excessively dense.
Its mild flavour makes it versatile. It can be eaten plain, dipped into a savoury soup, paired with vegetables, or enjoyed with tea. For people who prefer a richer taste, the bread can be served with butter or a savoury spread.
The flavour also depends on how the bread is cooked. A deeper golden crust produces a more pronounced toasted taste, while a lighter crust keeps the flavour delicate. Freshly cooked bread generally has the best balance of crispness and softness.
Tibetan Bread Recipe at a Glance
- Preparation time: 20 minutes
- Dough resting and rising time: 60–90 minutes
- Cooking time: 20–25 minutes
- Total time: Approximately 1 hour 45 minutes to 2 hours 15 minutes
- Cuisine: Tibetan-inspired Himalayan
- Course: Breakfast, snack, or side dish
- Difficulty: Easy to moderate
- Servings: 4
- Yield: 4 medium-sized breads
- Cooking method: Deep-frying or shallow-frying
- Dietary suitability: Vegetarian; can be made vegan
Actual preparation time depends on room temperature, yeast activity, dough thickness, and the cooking method you choose.
Ingredients for Tibetan Bread
The recipe uses common ingredients that are readily available in most Indian grocery stores and supermarkets.
Main ingredients
- 3 cups all-purpose flour (maida): Approximately 360 grams. This creates a soft, relatively light bread.
- 1 teaspoon instant yeast: Helps the dough rise and gives the bread a lighter interior.
- 1 tablespoon sugar: Provides food for the yeast and encourages browning.
- 1 teaspoon salt: Balances the flavour.
- 1 tablespoon neutral cooking oil: Helps keep the dough supple.
- 1 to 1¼ cups lukewarm water: Approximately 240–300 ml, added gradually as required.
- Oil for frying: Use enough for the chosen frying method.
Optional ingredients
- 2 tablespoons whole-wheat flour: Replace a small portion of the all-purpose flour for a slightly nuttier flavour.
- 1 tablespoon melted butter: Adds richness when mixed into the dough.
- A pinch of cumin: Provides a savoury variation, although it is not necessary for the basic recipe.
For a vegan version, use neutral vegetable oil instead of butter. The basic recipe is already dairy-free if butter is omitted.
Can you use whole-wheat flour?
Yes. You can prepare Tibetan-style bread with whole-wheat flour, commonly called atta in India. However, the result will be somewhat denser and less airy than a version made with maida.
For a balanced texture, begin with two cups of all-purpose flour and one cup of whole-wheat flour. Add water gradually because different flour brands absorb different amounts of liquid.
If you prefer to use only whole-wheat flour, allow the dough to rest well and avoid adding too much extra flour during kneading. The bread may be more substantial, with a stronger wheat flavour and a less delicate crumb.
Equipment You Will Need
You do not need a stand mixer or specialised bread-making equipment.
Prepare the following:
- A large mixing bowl
- Measuring cups or a kitchen scale
- A clean work surface or chopping board
- A rolling pin, if desired
- A deep, heavy-bottomed pan or kadai
- A slotted spoon or tongs
- A plate lined with paper towels or a wire rack
- A kitchen thermometer, if available
A heavy-bottomed pan helps maintain a more consistent oil temperature. This matters because oil that is too hot can brown the outside before the centre cooks, while oil that is too cool can make the bread absorb excess oil.
Step-by-Step Tibetan Bread Recipe
Step 1: Prepare the yeast mixture
- If you are using instant yeast, you can mix it directly into the flour. However, checking the yeast separately can help identify a problem before you prepare the entire dough.
- Take about ¼ cup of the lukewarm water from the measured quantity. Mix it with the sugar and yeast in a small bowl. Leave it for approximately 5–10 minutes.
- Depending on the yeast type and its condition, you may notice a foamy layer or small bubbles. This indicates that the yeast is active.
- The water should feel comfortably warm rather than hot. Very hot water can damage the yeast and prevent the dough from rising.
- If you are using instant yeast, foaming may be less obvious, so the absence of a thick foam does not always mean the yeast is inactive. Follow the manufacturer's instructions for your particular product.
Step 2: Mix the dry ingredients
- Take a large mixing bowl and add the flour and salt. If you are using whole-wheat flour, combine it with the all-purpose flour at this stage.
- Stir the ingredients with a spoon or whisk so that the salt is distributed evenly.
- Add the yeast mixture, the remaining water gradually, and one tablespoon of oil. Mix everything until the flour begins to come together into a rough dough.
- Avoid pouring all the remaining water in at once. Flour absorbs moisture differently depending on its type, freshness, and storage conditions. You want a dough that feels soft and slightly tacky rather than wet and runny.
- If the mixture seems dry, add water one tablespoon at a time. If it is extremely sticky, allow it to rest briefly before adding more flour.
Step 3: Knead the dough
- Transfer the dough to a lightly floured work surface.
- Push the dough forward with the heel of your hand, fold it back towards yourself, and rotate it slightly. Repeat this motion for approximately 8–10 minutes.
- At first, the dough may look rough and uneven. With kneading, it should become smoother, more elastic, and easier to handle.
- The dough should remain soft. Adding too much flour during kneading can make the finished bread tough, heavy, and less pleasant to eat.
- If the dough sticks to your hands, lightly oil your palms rather than repeatedly adding flour. A little stickiness is normal and often helps produce a softer bread.
- You do not need to develop an extremely strong bread-dough structure. The goal is an even, supple dough that can expand during rising and hold its shape during cooking.
Step 4: Let the dough rise
- Lightly grease the mixing bowl with oil and place the dough inside. Turn it once so that its surface is lightly coated.
- Cover the bowl with a clean kitchen towel, lid, or reusable cover. Leave it in a warm, draft-free place for approximately 45–75 minutes.
- The exact time depends on the room temperature and the yeast. In a warm Indian kitchen, the dough may rise relatively quickly. In cooler weather, it may need longer.
- Look for the dough to become visibly larger and softer. It does not need to reach an exact doubling point if it is already well aerated and relaxed.
- Avoid placing the dough in direct sunlight or near intense heat. Excessive warmth can damage the dough's structure or cause it to rise too quickly.
Step 5: Divide the dough
- Once the dough has risen, press it gently with your fingertips to release some of the larger air pockets.
- Transfer it to a lightly oiled or floured work surface and divide it into four equal portions.
- Shape each portion into a ball by folding the edges towards the centre and rolling it gently against the work surface.
- Cover the dough balls and allow them to rest for another 10–15 minutes. This short rest relaxes the gluten, making the dough easier to shape without excessive springing back.
- If you prefer smaller breads, divide the dough into six or eight portions. Smaller portions are easier to handle and may cook more evenly.
Step 6: Shape the Tibetan bread
- Flatten one dough ball gently with your palm. Use a rolling pin or your fingers to shape it into a round or slightly oval disc.
- For this home-style fried version, aim for a thickness of approximately 1–1.5 centimetres. A thicker bread will have a more substantial centre, while a thinner one will cook faster and develop a greater proportion of crust.
- Keep the remaining dough balls covered while you shape each bread. This prevents the surface from drying out.
- You can leave the bread as a plain disc or make a small indentation in the centre to help it cook more evenly. Avoid making the bread excessively thick in the middle, particularly if you plan to fry it in oil.
- If the dough repeatedly shrinks while you roll it, cover it and leave it for another five minutes before continuing.
Step 7: Heat the oil
- Pour enough neutral cooking oil into a deep pan to allow the dough to cook without touching the bottom continuously. For deep-frying, the oil should be deep enough to accommodate the bread safely with room for expansion.
- Heat the oil to approximately 170–180°C.
- A thermometer provides the most reliable reading. Without one, test with a tiny piece of dough. It should rise towards the surface and produce steady bubbles without immediately turning dark.
- If the oil begins smoking, remove the pan from the heat and allow it to cool. Never leave hot oil unattended.
- Do not overcrowd the pan. Cooking too many breads at once can lower the oil temperature, resulting in greasy bread and uneven browning.
Step 8: Fry the bread
- Carefully slide one shaped dough portion into the hot oil, lowering it away from you to minimise splashing.
- Allow it to cook for a short period before turning it with a slotted spoon or tongs. The bread should gradually puff, depending on its thickness and the dough's fermentation.
- Cook both sides until they become evenly golden brown. This generally takes around 2–4 minutes per bread, but thickness, oil temperature, and pan size will affect the timing.
- If the bread browns too quickly, reduce the heat slightly. The outside should not become dark while the centre remains doughy.
- If the bread does not puff, do not worry. Puffing varies with dough hydration, shaping, fermentation, and handling. A bread that remains flatter can still be enjoyable if it cooks through properly.
- Transfer the cooked bread to a wire rack or a plate lined with paper towels. Allow excess oil to drain.
- Repeat the process with the remaining portions, giving the oil time to return to the correct temperature between batches.
Step 9: Check that the centre is cooked
- Before serving, check the thickest part of one bread. The inside should be soft and cooked rather than wet, sticky, or raw.
- If the crust becomes golden before the centre is ready, the oil may be too hot or the dough may be too thick. Lower the temperature slightly and shape the remaining breads a little thinner.
- A food thermometer can help when checking doneness. For a bread made with a typical wheat dough, an internal temperature around 90–95°C is a useful general reference, although the texture and structure of this particular bread also matter.
Step 10: Serve immediately
- Tibetan-style fried bread tastes best when freshly cooked. The crust is at its most appealing when warm, while the inside remains soft.
- Serve it plain or with a little butter. For a savoury meal, pair it with vegetable soup, a meat-based stew, or cooked vegetables. For breakfast, try it with hot milk tea or Tibetan butter tea.
- If you are preparing bread for several people, cook it in batches and serve the first breads while the remaining portions are frying.
Traditional Tibetan Bread vs Other Himalayan Breads
Tibetan bread is sometimes confused with other breads found across the Himalayan region. Although these foods may share ingredients or cooking techniques, they are not necessarily the same dish.
Understanding the differences can help you choose the right recipe for your meal.
1. Tibetan fried bread
The version in this recipe uses yeast-raised dough and hot oil. It is relatively thick, with a golden exterior and a soft interior. It works well as a snack, breakfast item, or accompaniment to savoury dishes.
2. Tibetan flatbread
Flatbread-style preparations are generally thinner and may be cooked on a hot pan or griddle instead of being deep-fried. Their texture depends on whether the dough contains yeast and how much oil is used.
A pan-cooked variation can be a practical option for people who prefer to use less oil at home.
3. Balep
Balep refers to a family of Tibetan breads. Different preparations have their own ingredients, shapes, and cooking methods. Balep korkun, for example, is commonly described as a round bread cooked on a hot surface.
The name balep should not automatically be treated as synonymous with every fried Tibetan-style bread.
4. Luchi and puri
Luchi and puri are South Asian fried breads that may look similar to a Tibetan fried bread. However, traditional Indian puri is generally made without yeast and often puffs into a hollow centre when fried. Luchi is associated particularly with Bengali cuisine and is commonly made using refined wheat flour.
The recipes and cultural origins differ even when the finished breads have a similar golden appearance.
5. Tibetan tingmo
Tingmo is a steamed Tibetan bread with a soft, layered structure. It is usually served with savoury dishes and is prepared differently from fried bread.
If you want a soft bread without a fried crust, tingmo is another Tibetan preparation worth exploring.
Tips for Making Soft, Fluffy Tibetan Bread
A successful bread recipe depends on more than just the ingredient list. Small changes in dough consistency, fermentation, and frying temperature can make a noticeable difference.
Use fresh yeast
Yeast helps produce a lighter texture. If your yeast is expired or has been stored in humid conditions, the dough may rise slowly or fail to rise properly.
Keep yeast sealed according to the manufacturer's storage instructions. If you are uncertain about its condition, test it before mixing the complete dough.
Measure the water carefully
The dough should be soft and slightly tacky. A stiff dough often produces a dense bread, while a very wet dough may be difficult to shape.
Start with the lower end of the water range and add more gradually. If you are using atta instead of maida, you may need to adjust the water slightly.
Allow enough time for rising
Rushing the fermentation process can produce bread with a heavy centre. Let the dough expand naturally in a comfortable environment.
However, more rising time is not always better. If the dough becomes excessively inflated, weak, or begins to collapse, it may have fermented for too long.
Do not add excessive flour during shaping
A lightly floured work surface is sufficient. Too much additional flour can make the surface dry and alter the final texture.
If the dough is sticky, try lightly oiling your hands and allowing the dough to rest before adding more flour.
Maintain the correct oil temperature
This is one of the most important factors when making fried bread.
- Oil too hot: The exterior browns quickly while the centre may remain undercooked.
- Oil too cool: The bread can absorb more oil and become heavy.
- Oil at a suitable temperature: The bread cooks more evenly and develops a golden crust.
Allow the temperature to recover between batches instead of adding several cold dough portions at once.
Keep the thickness consistent
Try to shape each portion to a similar thickness. Consistent sizing makes it easier to judge cooking time and helps prevent one bread from becoming overcooked while another remains raw in the middle.
For a first attempt, medium-thickness discs are easier to manage than very large or unusually thick breads.
Common Tibetan Bread Mistakes and How to Fix Them
| Problem | Likely cause | What to do |
|---|---|---|
| Bread is hard | Dough was too dry or too much flour was added | Use a softer dough and avoid excess flour during kneading |
| Dough does not rise | Inactive yeast or unsuitable water temperature | Check yeast freshness and use lukewarm water |
| Bread is greasy | Oil temperature is too low | Bring the oil back to approximately 170–180°C |
| Outside burns quickly | Oil is too hot | Reduce the heat and monitor the temperature |
| Centre is raw | Bread is too thick or cooks too quickly outside | Shape thinner portions and fry at a controlled temperature |
| Bread does not puff | Dough, shaping, or fermentation conditions vary | Check the dough consistency and ensure even thickness |
| Bread is too dense | Insufficient fermentation or excessive flour | Allow the dough to rise and knead until supple |
| Crust becomes soft quickly | Steam is trapped while the bread is stacked or covered | Drain on a wire rack and serve soon after frying |
These adjustments are useful because bread-making conditions vary from kitchen to kitchen. The same recipe can behave differently depending on flour, humidity, room temperature, and the type of pan being used.
Can You Make Tibetan Bread Without Yeast?
Yes, you can prepare a quick, unleavened variation, although the result will be different from the yeast-raised recipe.
For a simple version, combine flour, salt, a little oil, and enough water to make a soft dough. Knead briefly and allow it to rest for approximately 15–20 minutes. Divide the dough, shape it into discs, and cook the breads on a lightly oiled skillet.
The result will generally be flatter and denser, with less of the airy texture associated with yeast fermentation.
You can also experiment with a small amount of baking powder for additional lift. However, this creates a variation rather than a universally traditional Tibetan preparation.
If your priority is convenience, an unleavened version is useful because it does not require an extended rising period. If you want a lighter, more bread-like interior, the yeast-raised recipe is the better starting point.
How to Make Tibetan Bread in a Pan
Deep-frying is not the only possible cooking method. A skillet or griddle can be used for a less oily variation.
Prepare the dough as described in the main recipe. After dividing it into portions, roll each piece into a thinner disc, approximately 5–8 millimetres thick.
Heat a heavy skillet over medium heat and brush it with a small amount of oil. Place one disc on the pan and cook until the underside develops light golden spots. Flip it and cook the other side.
Depending on the thickness and the heat, each bread may require several minutes on each side. Adjust the temperature so that the interior cooks before the exterior becomes too dark.
The resulting bread will be more similar to a pan-cooked flatbread than a deep-fried bread. It will generally have a drier surface, less oil, and a different crust.
This approach is useful for everyday meals when you want a bread that pairs well with soup, vegetables, or curry without using a deep-frying pan.
How to Make Tibetan Bread Vegan
The basic recipe can be made vegan without any complicated substitutions.
Use vegetable oil in the dough and for frying. Omit butter, milk, yoghurt, or other dairy ingredients if you are adapting a different recipe that contains them.
Check the ingredient labels on packaged yeast and any optional flavourings if you are preparing food for someone who strictly avoids animal-derived ingredients.
Serve the bread with vegetable soup, stir-fried vegetables, lentil dishes, or a plant-based tea alternative.
Although traditional butter tea contains butter and is not vegan, you can serve this bread with plain tea or a plant-based hot drink.
What to Serve with Tibetan Bread
Tibetan bread is mild enough to accompany several kinds of food. The best pairing depends on whether you want a simple breakfast, a light snack, or a more substantial meal.
Tibetan butter tea
Tibetan butter tea, often known as po cha, is a traditional drink made using tea, butter, salt, and water. Its rich, savoury character makes it a distinctive accompaniment to bread.
The drink and bread have different textures: the tea is smooth and warming, while the bread offers a satisfying bite.
Traditional butter tea may require ingredients and preparation techniques that differ from those used for ordinary milk tea. A cup of regular tea is an easy alternative if you are preparing a quick breakfast.
Milk tea
Milk tea is a convenient everyday pairing. Its warmth and mild sweetness complement the lightly savoury bread.
You can serve the bread with Indian chai, Tibetan-style tea, or plain black tea according to your preference.
Vegetable soup
A bowl of hot vegetable soup is a practical accompaniment, especially during colder weather. Carrots, potatoes, cabbage, onions, and other vegetables can be cooked into a simple broth.
Tear the bread into smaller pieces and dip them into the soup, or serve it on the side.
Thenthuk or other noodle soups
Thenthuk is a Tibetan noodle soup traditionally prepared with hand-pulled or hand-cut dough pieces, vegetables, and, depending on the version, meat.
A small piece of bread can accompany a bowl of soup, although serving both bread and noodles may make the meal quite filling.
Shapta
Shapta is a Tibetan-style preparation of sliced meat cooked with vegetables and seasonings. The specific ingredients and preparation can vary.
A bread-and-shapta meal provides a contrast between the soft bread and the savoury, seasoned filling. Vegetarian stir-fried vegetables can be used instead for a meat-free meal.
Vegetable curry
For an Indian home kitchen, serving Tibetan-style bread with a lightly spiced vegetable curry is a convenient fusion option. Potato, peas, cabbage, and mixed vegetables are all suitable choices.
This is a serving suggestion rather than a claim that every curry pairing is a traditional Tibetan combination.
Chutney and savoury dips
A simple tomato chutney, chilli sauce, or herb dip can add flavour to the bread. Use a small amount initially so that the dip complements rather than overwhelms the bread's mild taste.
Is Tibetan Bread Healthy?
The nutritional value of Tibetan bread depends on its ingredients, serving size, and cooking method.
The basic recipe provides carbohydrates from flour, while oil contributes fat. If whole-wheat flour is used, the bread may contain more fibre than a version made entirely with refined flour.
Deep-frying increases the amount of oil in the finished bread, but the exact quantity absorbed depends on the dough, cooking temperature, surface area, and draining method.
It would therefore be misleading to describe every Tibetan bread recipe as either healthy or unhealthy without considering the complete meal and portion size.
Approximate nutritional information
The following is an illustrative estimate for one of four medium-sized breads made with the ingredients in this recipe. It assumes that each portion absorbs a modest amount of frying oil. Actual values can differ considerably.
| Nutrient | Approximate amount per bread |
|---|---|
| Calories | 280–350 kcal |
| Carbohydrates | 50–60 g |
| Protein | 7–9 g |
| Fat | 5–12 g |
| Fibre | 1–3 g |
These figures are estimates, not laboratory-tested nutrition facts. The quantity of oil absorbed during frying is a particularly important source of variation.
Ways to adjust the recipe
If you want to change the nutritional profile, consider the following options:
- Replace a portion of maida with whole-wheat flour.
- Use the pan-cooked variation with a measured amount of oil.
- Serve the bread with vegetables, lentils, beans, or another protein-containing dish.
- Choose a portion size that fits your appetite and overall meal.
- Avoid repeatedly reusing degraded frying oil.
A balanced meal can include bread alongside vegetables and a protein source rather than relying on bread alone.
How to Store Tibetan Bread
Freshly fried bread is best eaten soon after cooking, but leftovers can be stored if handled properly.
At room temperature
Allow the bread to cool until it is no longer steaming heavily. Do not leave it exposed for extended periods, particularly in a warm kitchen.
As a general food-safety precaution, refrigerate cooked leftovers within two hours, or within one hour when the surrounding temperature exceeds 32°C.
In the refrigerator
Place the cooled bread in a clean, airtight container and refrigerate it. For best quality, use it within two to three days.
Refrigeration can make the bread firmer, so reheating is usually helpful.
In the freezer
For longer storage, freeze the cooled bread in a freezer-safe container or bag. Separate individual pieces with baking paper if necessary to prevent sticking.
Use within approximately one to two months for good quality. Allow the bread to thaw in the refrigerator or reheat it directly from frozen if the thickness permits.
Always discard bread that shows mould, unusual discolouration, or an unpleasant smell.
How to Reheat Tibetan Bread
The reheating method affects the final texture.
Skillet: Heat a dry or lightly oiled skillet over medium-low heat. Warm the bread on both sides until heated through. This method helps restore some surface texture.
Oven: Place the bread on a baking tray and heat in a preheated oven at approximately 160–180°C until warmed through. The time will depend on the bread's thickness and whether it is refrigerated or frozen.
Air fryer: Reheat at a moderate temperature for a few minutes, checking frequently to prevent the bread from drying out. Exact timing depends on the appliance and the size of the bread.
A microwave can warm the bread quickly, but it may make the texture softer and less crisp. If using a microwave, heat in short intervals and finish in a skillet if you want a drier exterior.
Frequently Asked Questions About Tibetan Bread
1. What is Tibetan bread made of?
This recipe uses all-purpose flour, yeast, sugar, salt, water, and oil. The dough is kneaded, allowed to rise, shaped into discs, and fried until golden. Other Tibetan breads may use different ingredients and cooking methods.
2. Is Tibetan bread always fried?
No. Tibetan cuisine includes different bread preparations. Some are fried, while others are cooked on a hot surface or steamed. The method depends on the particular bread being prepared.
3. Is Tibetan bread the same as Indian puri?
No. The yeast-raised bread in this recipe differs from traditional Indian puri, which is usually made with unleavened dough. They may look similar because both can be fried, but their dough preparation and texture are different.
4. Can I make Tibetan bread with atta?
Yes. Whole-wheat atta can replace some or all of the maida. The bread will generally be denser and have a stronger wheat flavour. You may need to adjust the amount of water.
5. Why is my Tibetan bread hard?
A hard result often comes from dough that is too dry, excessive flour during kneading, insufficient fermentation, or overcooking. Use a soft dough, allow it to rise adequately, and monitor the oil temperature.
6. Why did my bread not puff up?
Puffing depends on the dough's hydration, fermentation, thickness, and cooking conditions. Not every bread will puff completely. Focus on achieving an evenly cooked centre and a golden exterior.
7. Can I prepare the dough in advance?
Yes. You can prepare the dough ahead of time and refrigerate it in a covered container. Refrigerated fermentation will proceed more slowly, and the dough should be allowed to warm and relax sufficiently before shaping.
Avoid leaving yeast dough at room temperature for excessive periods, particularly in hot weather.
8. Can I use whole-wheat flour only?
Yes, although the texture will be different. A 100% whole-wheat version is likely to be heavier and less airy than one made with refined flour. Add water gradually and avoid overloading the dough with extra flour during shaping.
9. Can Tibetan bread be made without eggs or milk?
Yes. The basic recipe contains neither eggs nor milk. Water and vegetable oil are sufficient to make the dough, so it is naturally suitable for a vegan preparation.
10. What oil is best for frying Tibetan bread?
Use a neutral cooking oil suitable for frying, such as sunflower, canola, or another appropriate vegetable oil. The oil should tolerate the required cooking temperature without smoking.
11. Can I bake Tibetan bread instead of frying it?
You can experiment with baking the shaped dough, but the result will differ from deep-fried bread. It will generally have a drier crust and less of the characteristic fried texture.
A baked variation should be treated as an adaptation rather than an exact substitute for the recipe above.
12. Is Tibetan bread sweet or savoury?
The version in this recipe is mildly savoury. A small amount of sugar helps the yeast and browning but does not make the bread a sweet pastry. Other variations may have different flavour profiles.
13. How many calories are in Tibetan bread?
The amount depends on bread size, flour type, and oil absorption. A medium bread made using this recipe may provide roughly 280–350 calories, but this should be treated as an estimate rather than a fixed nutritional value.
14. What is the best time to eat Tibetan bread?
It can be eaten at breakfast, as an afternoon snack, or alongside lunch or dinner. The best serving time depends on your appetite and what else is included in the meal.
15. Can I serve Tibetan bread with Indian food?
Yes. It pairs well with vegetable dishes, lentils, soups, and other savoury preparations. These combinations are convenient adaptations for home cooking, although they should not all be presented as traditional Tibetan pairings.
Final Thoughts
Tibetan bread is an appealing introduction to Himalayan-inspired home cooking because it relies on simple ingredients and straightforward techniques. With flour, yeast, water, salt, and oil, you can prepare a bread that is golden outside, soft inside, and versatile enough to accompany both hot drinks and savoury meals.
The most important steps are to make a soft dough, allow enough time for fermentation, shape the portions evenly, and control the oil temperature during cooking. Once you understand these basics, it becomes easier to adjust the recipe to your preferred thickness and texture.
For the most satisfying result, serve the bread freshly cooked with tea, soup, vegetables, or another dish you enjoy. If you prefer a less oily preparation, try the skillet variation and experiment with a mixture of refined and whole-wheat flour.
Above all, remember that Tibetan cuisine includes a variety of breads, each with its own character and regional context. This recipe is one accessible way to explore those flavours at home, while leaving plenty of room to discover other Tibetan preparations.
Give this Tibetan bread recipe a try, and enjoy a warm, homemade taste of Himalayan-inspired cooking.